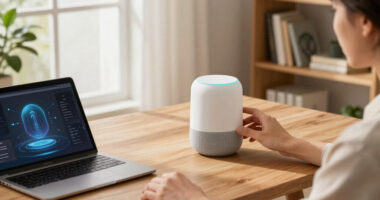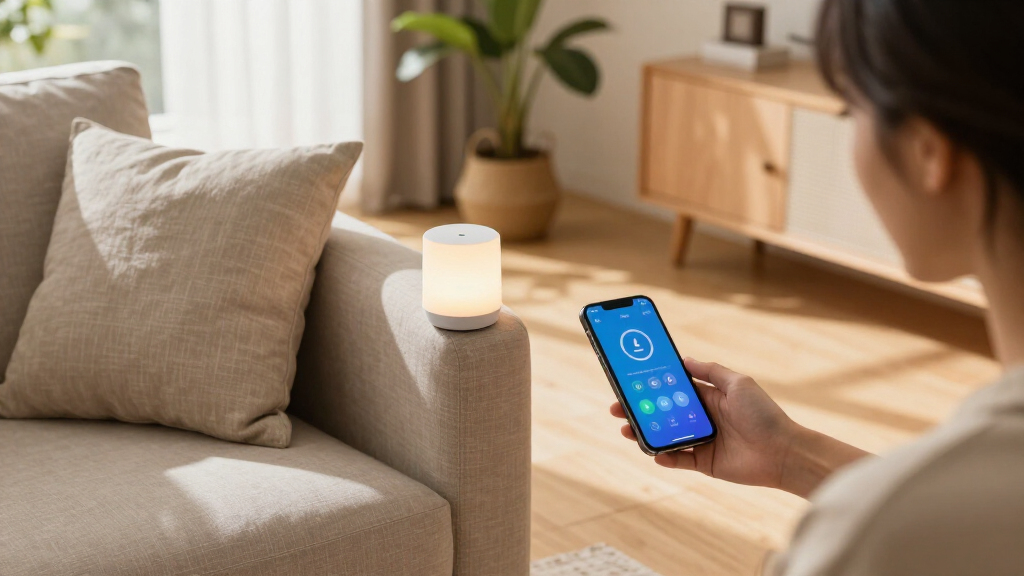

Set up AI-powered home automation by connecting compatible lights, sensors, thermostats, or other devices to a home platform and creating routines you can test and adjust. This guide is for beginners who have a working home Wi-Fi network and want practical automations such as scheduled lighting or temperature adjustments. Allow about 1-2 hours, depending on how many devices you install and whether they need updates.

Get business pricing on tech for your team
- Business-only prices and quantity discounts
- Tax-exempt purchasing
- Multiple users, one account, clear invoices

Hubitat Elevation C-8 Pro Smart Home Hub
- ✔ Connectivity: Matter 1.5, Z-Wave 800 Series with Long Range, Zigbee 3.0, Bluetooth
- ✔ Voice assistants: Amazon Alexa, Google Home, Apple HomeKit
- ✔ Device compatibility: 1,000+ devices across 100+ brands

SwitchBot AI Hub with OpenClaw Support, Local Camera Storage, Home Assistant, and Matter Bridge
- ✔ Model: W8002100
- ✔ Dimensions: 7.8 x 5.79 x 2.2 in
- ✔ Weight: 1.17 lb

LinknLink HomeClaw Smart Home Gateway with Home Assistant and OpenClaw AI
- ✔ Manufacturer and model: LinknLink HomeClaw
- ✔ Connectivity: Zigbee 3.0; Z-Wave via separately sold USB dongle; Wi-Fi and other smart devices
- ✔ Platform compatibility: Apple Home, Alexa, Google Home
Difficulty: Beginner | Time: 1-2 hours
What You’ll Need
Tools & Materials:
- Phone or tablet with the device maker’s app installed
- AI-enabled smart home hub, speaker, or platform account, if required by your devices
- Compatible smart devices and any required hubs, power supplies, or mounting hardware
- Home Wi-Fi network credentials
Knowledge:
- Basic ability to install an app and connect a device to Wi-Fi
- Ability to identify the rooms and routines you want to automate
Check device compatibility with your chosen platform before buying or installing. Some devices require a separate hub, a specific Wi-Fi band, or a subscription for certain AI features. Use only devices designed for your electrical system; hire a qualified electrician for fixed wiring. Keep account passwords private.
Hubitat Elevation C-8 Pro Smart Home Hub
The Hubitat Elevation C-8 Pro earns our top spot because its AI-assisted automation builder sits inside a hub built for broad, local control. Matter 1.5, Z-Wave 800 Series with Long Range, Zigbee 3.0 and Bluetooth give it a wider starting point than the other picks, which center on Home Assistant and more specific AI or camera workflows. For households with devices from several generations or ecosystems, that range can reduce the need to organize automations around a single brand.Its most useful distinction is that automations run locally, including when internet access is down. That supports routines that need to keep functioning at home even if a cloud service is unavailable. The two external antennas are another practical advantage where wireless reach matters, although they do not remove the need to check placement and device compatibility. Alexa, Google Home and Apple HomeKit support make voice control possible across common platforms, while the platform itself requires no subscription.The tradeoff is the learning curve. Hubitat’s advanced rule engine offers room to shape more involved routines, but buyers who want a quick, guided setup may prefer SwitchBot or HomeClaw, both of which include Home Assistant pre-installed. Hubitat’s community resources can help with setup, yet some buyers may find that less straightforward than a tightly guided product experience. Its AI builder is useful as part of the automation toolkit, but the supplied details do not establish that every routine can be created or managed through plain language.We recommend Hubitat when protocol breadth and offline reliability matter more than a hands-off setup. It is the most balanced hub here for building a flexible system without a platform subscription, though it rewards patience and some willingness to learn.
Pros:
- Runs automations locally, including during internet outages
- Supports Matter, Z-Wave, Zigbee and Bluetooth
- Works with Alexa, Google Home and Apple HomeKit
- No platform subscription required
Cons:
- Advanced rules may take time to learn
- Some setup guidance and integrations rely on community resources
Best for: Households combining Matter, Z-Wave, Zigbee and Bluetooth devices that want local routines and broad voice assistant compatibility.
Not ideal for: Buyers who want a guided, plug-and-play experience or expect every automation to be created through conversational AI.
Bottom line: Choose Hubitat for the broadest mix of local control and protocol support, provided you are comfortable learning its automation tools.
“Choose Hubitat for the broadest mix of local control and protocol support, provided you are comfortable learning its automation tools.”
SwitchBot AI Hub with OpenClaw Support, Local Camera Storage, Home Assistant, and Matter Bridge
The SwitchBot AI Hub is the clearest choice for a home where cameras and SwitchBot devices are central to automation. It supports up to eight compatible cameras and stores event recordings on the included 16GB MicroSD card. That local storage gives buyers a direct way to keep recordings on the hub; the card can be expanded, which is helpful if event history becomes a more important part of the setup.Like HomeClaw, it comes with Home Assistant pre-installed and supports Matter bridging. Its additional strength is the combination of camera connections, local recording and local automations for select SwitchBot Bluetooth Low Energy devices. That makes it more purpose-built for a camera-led SwitchBot home than Hubitat, whose standout advantage is wider protocol coverage across smart home device types.There are qualifications to factor in. Some AI features require both an AI+ subscription and compatible cameras, so the hub’s AI offering is not a universal, subscription-free capability. The supplied description also says IR control is not included; buyers who rely on infrared control should consider another part of their system or a different hub. While preinstalled Home Assistant avoids starting from a blank software installation, it does not guarantee every desired automation will be simple to configure.Choose SwitchBot when local camera event storage and a SwitchBot-centered setup are higher priorities than broad built-in radio support. Compared with HomeClaw, it has a more explicit camera role; compared with Hubitat, it trades broad protocol coverage for that focused recording and device workflow.
Pros:
- Supports up to eight compatible cameras
- Includes 16GB MicroSD storage for local event recordings
- Home Assistant comes pre-installed
- Supports Matter bridging and local automations for select SwitchBot BLE devices
Cons:
- Some AI features require an AI+ subscription and compatible cameras
- IR control is not included
Best for: SwitchBot households that want to connect compatible cameras, keep event recordings locally and use Home Assistant features from the outset.
Not ideal for: Buyers who need IR control, want all AI features without a subscription, or do not own compatible cameras and SwitchBot devices.
Bottom line: Pick SwitchBot for its camera storage and SwitchBot-specific workflows, after checking camera compatibility and the AI subscription requirements.
“Pick SwitchBot for its camera storage and SwitchBot-specific workflows, after checking camera compatibility and the AI subscription requirements.”
LinknLink HomeClaw Smart Home Gateway with Home Assistant and OpenClaw AI
LinknLink HomeClaw stands out for putting OpenClaw AI tasks and Home Assistant in the same local-first gateway. Its plain-language automation support is the most explicit match here for buyers who want AI to help turn an instruction into a smart home routine. It also supports general assistant work such as writing and research, which extends its role beyond device control.Like the SwitchBot hub, HomeClaw offers pre-installed Home Assistant and Matter bridging; it also supports Zigbee 3.0 and lists compatibility with Apple Home, Alexa and Google Home. Local operation means the gateway can continue working without an internet connection, and its built-in peer-to-peer tunnel provides remote access. Compared with SwitchBot, its supplied specifications do not highlight camera storage or a multi-camera capacity. Compared with Hubitat, its appeal is the more direct plain-language AI framing, while its radio setup is less complete out of the box.The main catch is Z-Wave requires a separately sold USB dongle. Buyers already using Z-Wave devices should include that extra component in their planning. The small gateway can also require setup or configuration for some AI and automation capabilities, so “plain language” should not be read as a promise that every device or routine will work without adjustments. Its listed device ecosystem includes Zigbee and Matter bridging, but buyers should verify support for specific devices before committing.HomeClaw makes the most sense for someone who values AI-assisted automation and a Home Assistant foundation, especially if local operation and remote access are both priorities. It is a more specialized recommendation than Hubitat: choose it for the AI interaction model, not for the widest built-in protocol set.
Pros:
- Home Assistant setup includes backup and automatic restore features
- Supports Matter bridging and multiple smart home platforms
- Local processing allows operation without internet access
- OpenClaw supports plain-language automation and general assistant tasks
Cons:
- Z-Wave needs a separately sold USB dongle
- Some AI and automation capabilities may need setup or configuration
Best for: Home Assistant-curious buyers who want plain-language AI assistance, local operation and built-in remote access.
Not ideal for: Households that need built-in Z-Wave support, camera recording features, or an automation experience requiring little configuration.
Bottom line: Choose HomeClaw when plain-language AI assistance and local Home Assistant operation matter more than having Z-Wave built in.
“Choose HomeClaw when plain-language AI assistance and local Home Assistant operation matter more than having Z-Wave built in.”
As an Amazon Associate we earn from qualifying purchases.
Before You Start
Choose one simple routine to build first, such as turning a lamp on at sunset. Keep manual controls available while you test. Review each device’s privacy settings and decide whether voice recordings, occupancy data, or other information may be stored or shared. Do not automate locks, heaters, ovens, or other safety-sensitive equipment until you understand the device’s limits and have tested its behavior.
Step-by-Step Instructions
Step 1: Choose your first automation
Write down one routine in a clear form: what should happen, which device should do it, and what should trigger it. For example: “At sunset, turn on the living-room lamp.” Start with a single device and a predictable trigger so you can tell whether the setup works.
Tip: Avoid combining several rooms, conditions, and actions in your first routine. Add complexity after the basic automation works.
Check: You have a specific trigger and one device action written down.
Step 2: Check device and network compatibility
Read the device packaging or manufacturer’s setup page and confirm that the device works with your home platform. Check whether it needs a hub, a certain Wi-Fi band, Bluetooth during setup, or a subscription for the feature you plan to use. Confirm that your phone can connect to the required home network where you will install it.
Tip: A device that works with its own app may not support every feature in another platform. Check support for the routine or voice control you intend to use.
Check: You know which app or hub is required and have the needed network and account details.
Step 3: Secure your home platform account
Install the official platform and device apps from your phone’s app store. Sign in or create an account with a unique password, and turn on multi-factor authentication if it is available. Review account recovery details and do not share login codes with anyone.
Tip: Grant only the app permissions needed for setup and the features you plan to use. You can revisit location, microphone, or contact permissions later.
Check: You can open the platform app and reach its home or device setup screen.
Step 4: Install and power the device
Place or mount the device according to its manufacturer’s instructions, then connect power or batteries. For a plug-in device, use an appropriate outlet and keep vents, sensors, and moving parts unobstructed. For fixed electrical work, stop and contact a qualified electrician if you are not trained to do it.
Tip: Put wireless devices within range of the router or hub during setup. You can move them to their final position after pairing if the manufacturer allows it.
Check: The device powers on and shows the setup indicator described in its instructions.
Step 5: Add the device to the platform
In the official app, choose the option to add a device and follow the prompts. Scan its setup code if requested, select the correct home Wi-Fi network, and enter the password in the app. If the platform asks you to connect the device through its maker’s account or hub, follow that linking process and return to the home app afterward.
Tip: Keep your phone on the same home network during pairing. If setup fails, check whether the device requires a 2.4 GHz network or temporary Bluetooth access.
Check: The device appears in the app as online or ready, and you can control it from the app.
Step 6: Name the device and assign its room
Give the device a short, distinct name such as “Desk lamp” or “Hall thermostat,” then assign it to the correct room. Avoid names that sound alike, especially if you plan to use voice commands. Check the room and device type before saving.
Tip: Use names that describe the device’s location or purpose. Clear names help both household members and voice assistants identify the right control.
Check: The device appears in the intended room with a name you can recognize at a glance.
Step 7: Update the device and review settings
Open the device details and install any available firmware update. Keep the device powered and connected while it updates. Then review available privacy, activity, and AI options, such as whether the device uses occupancy detection, voice processing, or cloud-based suggestions, and select settings that fit your household.
Tip: Do not unplug a device during an update. If the app shows an update in progress, wait for its completion message before continuing.
Check: The app shows the current device status without a pending update, and you have reviewed the relevant data and AI settings.
Step 8: Create the routine
Open the platform’s automation or routine section and create a new routine. Choose the trigger you planned, such as a schedule, sunset, or sensor event. Add the device action, set the desired value or state, and save. If the platform offers AI suggestions, review the trigger, action, and timing before accepting one.
Tip: Start with a condition you can predict. For a sunset routine, check the home location and time zone in the platform settings.
Check: The routine appears in the automation list with the intended trigger and action.
Step 9: Run a safe test
Use the app’s test or run control if available. Otherwise, temporarily choose a trigger you can activate now, such as a test schedule a few minutes ahead. Watch the device respond, then restore the intended trigger and schedule. Confirm that the routine does not repeat more often than you expect.
Tip: For a thermostat or other device that affects comfort or safety, test a small change and confirm you can restore the previous setting manually.
Check: The device performs the planned action once, and the app shows the routine as enabled.
Step 10: Check household access and manual control
Show household members how to control the device through its app or physical switch. If you want to share control, use the platform’s household invitation feature rather than sharing your password. Explain how to pause or disable the routine if it behaves unexpectedly.
Tip: Keep a manual control path for essential devices, and check what happens during an internet or power outage.
Check: Authorized household members can find the device, and someone in the home can turn it off or adjust it manually.
Common Mistakes to Avoid
- Buying a device that does not support the chosen home platform or desired feature. — Confirm platform, hub, network, and subscription requirements before purchase.
- Giving devices similar names or placing them in the wrong room. — Use short, distinct names and verify each room assignment before building routines.
- Creating a complex routine before confirming device control works. — Pair and test one device first, then add one trigger and one action.
- Leaving default privacy or AI settings unchecked. — Review what data the device collects, where it is processed, and which features you want enabled.
Troubleshooting
Problem: The app cannot find the device during setup.
Solution: Move the device closer to the router or hub, restart it using the manufacturer’s instructions, and check that Bluetooth or local network access is enabled if the app requires it. Confirm the device is in pairing mode.
Problem: The device will not join Wi-Fi.
Solution: Check the password and the device’s supported Wi-Fi band. During setup, connect your phone to the required network and pause any VPN that may block local discovery. Restart the router only if other devices also have connection problems.
Problem: The routine is saved but does not run.
Solution: Confirm the routine is enabled, check its trigger time and home location, and verify the device is online. Test the routine manually, then check app notification or activity history for a trigger or connection error.
Problem: The device responds slowly or drops offline.
Solution: Check signal strength and hub placement, install available updates, and move the device closer to the router or hub. If several devices are affected, inspect the home internet connection and router status.
What Success Looks Like
Your device appears online in the correct room, responds to manual control, and has current software. The routine shows the trigger and action you intended, runs during a test, and can be paused or adjusted from the app. Household members know how to control the device manually, and you have reviewed the privacy settings that apply to its AI features.
Next Steps
Watch the routine for a few days and adjust timing, device placement, or conditions if it triggers too often or misses an event. Add devices one at a time, testing each before linking it to other routines. Review app access and privacy settings when household members change, and check device updates periodically. If a device controls fixed wiring or safety-sensitive equipment, follow its manufacturer’s instructions and use a qualified professional when needed.
Frequently Asked Questions
Do AI-powered home devices need internet access?
Many need internet access for remote control, voice assistants, cloud processing, or updates. Some routines can run locally through a compatible hub during an internet outage. Check the device and platform documentation for offline behavior.
Can I mix devices from different brands?
Often, if the devices support the same platform or interoperability standard. Check which features work across brands; basic on-and-off control may be supported even when advanced sensing or AI features are not.
Will a routine still work if my Wi-Fi goes down?
It depends on the device and where the routine runs. Cloud-based routines may stop, while local hub automations may continue. Test the documented offline behavior before relying on an automation for an important task.
How can I limit data collection?
Review privacy controls in both the device maker’s app and the home platform. Turn off optional recording, data sharing, or personalization features you do not want, and remove app permissions that are not needed for the device’s functions.
Fall Picks
fall essentials
As an affiliate, we earn on qualifying purchases.