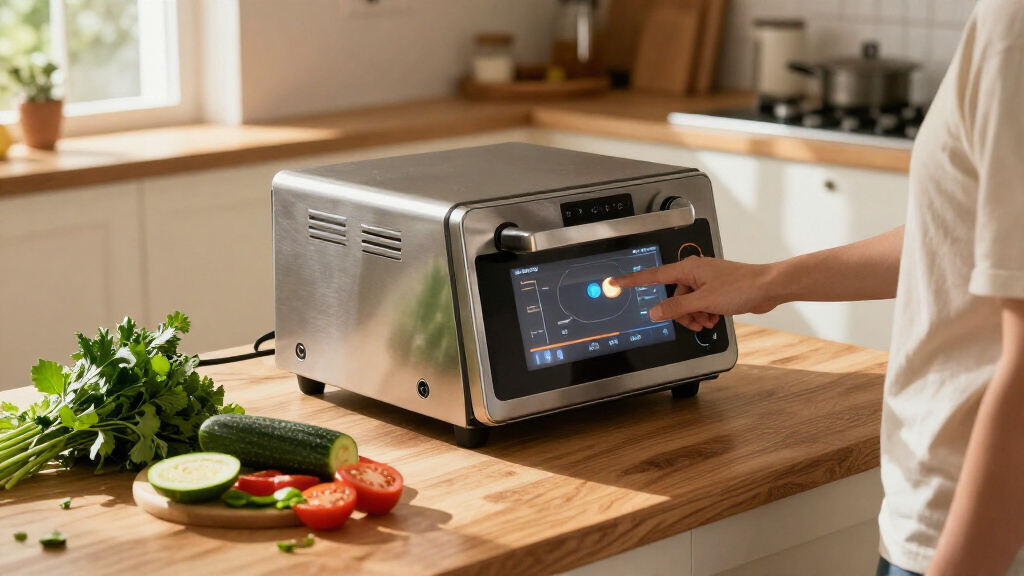
Set up AI-powered kitchen tools to help plan meals, track ingredients, and guide cooking. This beginner guide is for people with a smartphone and at least one connected kitchen device or app. Allow 1-2 hours for setup and a short test; the exact time depends on your devices and Wi-Fi.

Get business pricing on tech for your team
- Business-only prices and quantity discounts
- Tax-exempt purchasing
- Multiple users, one account, clear invoices

TOKIT Omni Cook C2 21-in-1 Cooking Robot and Food Processor
- ✔ Functions: 21 listed
- ✔ Bowl capacity: 2.2 L
- ✔ Guided recipes: 3,000+

JINKYLIN KC1 Multifunctional Cooking Food Processor with Built-In Scale and 7-Inch Screen
- ✔ Model: KC1
- ✔ Capacity: 3.5 L
- ✔ Functions: Mix, chop, steam, slow cook, fry, knead and weigh

KAIKAFEI All-in-One Smart Cooking Robot with 7-inch Touchscreen and WiFi
- ✔ Capacity: 3 L
- ✔ Temperature range: 37–160°C
- ✔ Display: 7-inch TFT touchscreen
Difficulty: Beginner | Time: 1-2 hours
What You’ll Need
Tools & Materials:
- Smartphone or tablet with the device manufacturer’s app store access
- Home Wi-Fi and its network password
- One or more compatible smart kitchen devices, such as a temperature probe, smart scale, connected oven, or voice assistant
- Ingredient list or pantry inventory, if using meal-planning or food-tracking features
Knowledge:
- Basic ability to install an app and connect a device to Wi-Fi
- Awareness of your household’s dietary restrictions and cooking preferences
Check device compatibility, power requirements, and the manufacturer’s safety instructions before buying or connecting equipment. Keep appliance manuals available. AI suggestions can contain errors; verify ingredient quantities, temperatures, and allergy information yourself.
TOKIT Omni Cook C2 21-in-1 Cooking Robot and Food Processor
The TOKIT Omni Cook C2 is the most rounded option for someone who wants one guided appliance to cover both prep and cooking. Its 21 listed functions include chopping, kneading, steaming, grinding and sous-vide cooking, while the built-in scale can simplify following a recipe that calls for measured ingredients. The 7-inch touchscreen and cloud recipe access give it a more connected workflow than the supplied JINKYLIN details, which mention guided recipes and custom storage but do not specify Wi-Fi.That breadth earns TOKIT the top spot, although function count alone does not tell us how well each task performs. Its 2.2-liter bowl is smaller than JINKYLIN’s 3.5-liter and KAIKAFEI’s 3-liter capacities, so larger households may prefer those alternatives. A self-cleaning mode helps with routine cleanup, but the care instructions still specify hand washing. Its 14-by-14-inch footprint also needs a permanent counter home. We would choose it for versatility and connected guidance, while buyers prioritizing batch size should look at JINKYLIN first.
Pros:
- Lists 21 cooking and food-preparation functions, including sous-vide cooking.
- Built-in scale supports measuring ingredients in the bowl-side workflow.
- Wi-Fi recipe database and touchscreen offer guided cooking.
- Self-cleaning mode can reduce routine cleanup effort.
Cons:
- The 2.2-liter bowl is smaller than the stated capacities of both alternatives.
- Care instructions specify hand washing despite the self-cleaning mode.
- The 14-by-14-inch footprint still occupies meaningful counter space.
Best for: Cooks who want the broadest stated mix of prep and cooking functions, a built-in scale and Wi-Fi recipe guidance in one appliance.
Not ideal for: Households that need a larger stated bowl, want fully dishwasher-friendly care, or have little counter space.
Bottom line: Choose TOKIT for the broadest described feature set and connected recipe guidance, provided its smaller bowl fits your cooking volume.
“Choose TOKIT for the broadest described feature set and connected recipe guidance, provided its smaller bowl fits your cooking volume.”
JINKYLIN KC1 Multifunctional Cooking Food Processor with Built-In Scale and 7-Inch Screen
If capacity is the deciding factor, the JINKYLIN KC1 has the largest stated bowl in this lineup at 3.5 liters. That makes it the more compelling fit for preparing bigger batches than TOKIT’s 2.2-liter bowl, and it edges KAIKAFEI’s 3-liter capacity on paper. A built-in scale that measures in grams and a touchscreen with guided recipes and custom recipe storage give cooks a way to follow established steps while keeping preferred recipes close at hand.Its role is less about having the longest advertised function list and more about pairing useful cooking tools with the biggest bowl. It covers mixing, chopping, steaming, slow cooking, frying, kneading and weighing, and removable parts plus automatic cleaning offer a convenient cleanup path. Still, the listing specifies hand-wash care, so automatic cleaning should not be read as dishwasher-safe maintenance. The lid-lock requirement is a stated safety condition; it may also interrupt a workflow if the lid is not seated correctly. Compared with TOKIT, JINKYLIN’s supplied details do not mention Wi-Fi recipe access, and buyers should not assume connected recipe updates.
Pros:
- Largest stated bowl capacity here at 3.5 liters.
- Built-in scale measures ingredients in grams.
- Touchscreen supports guided recipes and custom recipe storage.
- Automatic cleaning and removable washable parts aid cleanup.
Cons:
- Care information specifies hand washing.
- The machine operates only when its lid is locked.
- Wi-Fi recipe access is not specified in the supplied product details.
Best for: People who prepare larger quantities and want a built-in scale plus the option to save custom recipes on the touchscreen.
Not ideal for: Buyers who prioritize explicitly listed Wi-Fi recipe access, dishwasher care, or the smallest possible appliance.
Bottom line: Pick JINKYLIN when a larger bowl and custom recipe storage matter more than explicitly documented Wi-Fi recipe access.
“Pick JINKYLIN when a larger bowl and custom recipe storage matter more than explicitly documented Wi-Fi recipe access.”
KAIKAFEI All-in-One Smart Cooking Robot with 7-inch Touchscreen and WiFi
The KAIKAFEI cooking robot stands out for combining a 3-liter bowl with a stated temperature range of 37–160°C. That range gives its guided cooking setup more explicit temperature detail than the other two listings, and the product description points to methods such as sous vide and slow cooking. Its Wi-Fi connection and 7-inch TFT touchscreen provide step-by-step online recipe access, while a self-cleaning mode speaks to busy cooks who want fewer separate tools and a simpler post-meal routine.Against JINKYLIN, KAIKAFEI gives up half a liter of stated capacity and does not list a built-in scale or custom recipe storage. Against TOKIT, it offers a larger bowl than the 2.2-liter C2, but fewer specific functions are named in the description. The main practical concern is its 22.44-inch listed depth, which can be difficult to accommodate on a shallow counter. ABS plastic construction is another consideration beside JINKYLIN’s stainless steel specification. Guided online recipes also depend on Wi-Fi, so buyers should check what remains usable when their connection is unavailable.
Pros:
- 3-liter capacity is larger than TOKIT’s stated bowl.
- 37–160°C temperature control supports a wide range of guided cooking tasks.
- Wi-Fi recipes, touchscreen guidance and self-cleaning are included in the description.
- Combines blending, cooking, steaming and kneading functions.
Cons:
- Listed depth of over 22 inches may be difficult to fit on a counter.
- ABS plastic construction may be less durable than the stainless steel specified for JINKYLIN.
- Guided online recipes may be limited without an internet connection.
Best for: Busy households seeking a 3-liter bowl, connected recipe guidance and a clearly stated temperature range for varied cooking methods.
Not ideal for: Cooks with shallow counters, those who want a built-in scale, or buyers who need recipe guidance to work offline.
Bottom line: Choose KAIKAFEI for its temperature range and family-size bowl if you have the counter depth and reliable Wi-Fi it requires.
“Choose KAIKAFEI for its temperature range and family-size bowl if you have the counter depth and reliable Wi-Fi it requires.”
As an Amazon Associate we earn from qualifying purchases.
Before You Start
Choose one routine to automate first, such as tracking refrigerator items or monitoring the internal temperature of a roast. Confirm the device works with your phone and network. Use a strong, unique password for each account, install updates from the official app store, and avoid sharing your kitchen account with people who do not need access. Keep hands-on control of heat-producing appliances; do not rely on an AI feature to prevent burns, fires, or foodborne illness.
Step-by-Step Instructions
Step 1: Choose a kitchen task
Write down one task you want help with and the result you expect. For example, choose “remind me when milk is nearly out” or “show the food’s internal temperature while it cooks.” Match the task to a tool: a connected temperature probe for monitoring food, a smart scale for weighing, or a planning app for recipes and shopping lists. Start with a task you can check yourself.
Tip: Avoid automating several parts of a meal at once. A small first setup makes it easier to find the cause of a problem.
Check: You can name the task, the tool that supports it, and a visible result that would show it is working.
Step 2: Review privacy and device settings
Read the app’s permissions and privacy settings before creating an account. Grant only the access needed for your chosen task, such as Bluetooth for pairing or notifications for a cooking alert. Check whether voice recordings, photos, or household data are stored or shared, and turn off optional sharing you do not want. Use a unique password and enable multifactor authentication if offered.
Tip: A meal planner may ask for dietary preferences, while a voice assistant may process spoken commands in the cloud. Review each service separately.
Check: The account is protected, permissions match the feature you plan to use, and you know where to change notification and data-sharing settings.
Step 3: Install and update the app
Install the manufacturer’s official app or the app named in the device manual. Sign in or create an account, then install available app and device firmware updates. Keep the device plugged in or charged during firmware updates, and do not unplug it until the app reports completion. Read the setup prompts for any model-specific requirements.
Tip: Do not install an app from an unfamiliar link or scan a setup code sent by an unknown person.
Check: The app opens without an update warning, and it shows the correct device model or is ready to add a device.
Step 4: Connect the device to your network
Place the device near your router for setup, turn on Bluetooth if pairing requires it, and follow the app’s pairing instructions. Select your home network and enter its password carefully. Some devices support only 2.4 GHz Wi-Fi; if pairing fails, check the manual and connect your phone to the supported band during setup. Move the device to its intended location after pairing and confirm that it reconnects.
Tip: Do not put a connected appliance where its cord, ventilation, or controls are obstructed. Follow the manual’s placement instructions.
Check: The app shows the device as online, and its status updates after you refresh or reopen the device screen.
Step 5: Set up the chosen feature
Open the feature for your selected task and enter only the information it needs. For a food-tracking app, add a few current items and their dates. For meal planning, enter servings, available ingredients, and verified dietary restrictions. For a temperature probe, select the food type and target temperature from a reliable food-safety source or the manufacturer’s instructions. Review each AI-generated recipe or recommendation before acting on it.
Tip: AI may misread a label or suggest an unsafe substitute. Check labels for allergens and confirm cooking temperatures with a trusted food-safety reference.
Check: The feature displays your entries correctly and produces a plan, reminder, or reading that you can understand and verify.
Step 6: Create one simple automation
Set one trigger and one action, such as “when the probe reaches my selected target, send a phone notification.” For pantry reminders, choose a clear threshold and notification method. Keep any action that starts heat, changes appliance settings, or affects food preparation under your direct control unless the manufacturer explicitly supports it and provides safety instructions. Save the routine with a descriptive name.
Tip: Use an alert that you will notice while cooking, and avoid duplicate alerts from multiple devices.
Check: The saved routine shows the intended trigger and action, with notifications enabled on the phone or device you will use.
Step 7: Run a safe test
Test the routine with a low-risk example before relying on it during a meal. For a notification, use the app’s test alert if available. For a probe, check its reading against the device instructions and a separate food thermometer when practical. For an inventory reminder, change a sample item’s status or threshold and confirm the alert arrives. Do not deliberately set an unsafe temperature or start an appliance to test automation.
Tip: Keep a manual thermometer, timer, or written inventory available until you have seen the tool work reliably.
Check: The device reports a plausible reading or the test notification arrives, and you can still operate the appliance manually.
Step 8: Use the tool and review its output
Use the feature during a real cooking or planning task, but compare its output with labels, recipe instructions, and food-safety guidance. Confirm the food reaches a safe internal temperature with a thermometer when required. Correct inaccurate inventory entries and dismiss alerts only after checking the item or food. If the device loses connection, switch to your manual method instead of assuming the automation is active.
Tip: Treat AI suggestions as drafts. Your own checks remain the final decision for allergens, cooking, and appliance operation.
Check: The tool helps with the selected task, its information is accurate enough to act on after verification, and you know what to do if it goes offline.
Common Mistakes to Avoid
- Buying a device before checking app, Wi-Fi, or phone compatibility. — Check the manufacturer’s compatibility list and supported network bands before purchase or setup.
- Trusting an AI recipe or food reading without checking it. — Verify allergens against package labels and cooking temperatures against trusted food-safety guidance.
- Creating too many alerts or automations at once. — Start with one trigger and one action, test it, then add another only if it solves a real problem.
- Assuming a connected appliance will safely manage itself. — Keep manual oversight, follow the appliance manual, and use a separate thermometer or timer when the task calls for one.
Troubleshooting
Problem: The device does not appear in the app.
Solution: Confirm it has power, enable Bluetooth if required, move it near the router, and restart pairing using the manual. Check that the phone and device support the same connection method.
Problem: Wi-Fi setup fails or the device goes offline.
Solution: Check the network password and the device’s supported Wi-Fi band. Try pairing near the router, then restart the router and device if the manual permits. Reconnect using the app.
Problem: A cooking or inventory notification does not arrive.
Solution: Check the routine’s trigger, action, and saved status. Allow notifications for the app in phone settings, confirm the phone has network access, and run the app’s test alert.
Problem: The AI suggests an unsuitable ingredient or cooking result.
Solution: Do not use the suggestion until you have checked ingredients, allergy labels, recipe quantities, and safe cooking guidance. Edit the preferences or use a verified recipe instead.
What Success Looks Like
The selected device appears online, the feature contains accurate entries, and the test trigger produces the expected result. You can explain what the automation does, check its output, and switch to a manual method if the app or network fails. Food reaches a verified safe temperature, and no AI suggestion overrides allergy checks or appliance instructions.
Next Steps
Use the routine for a few meals and note missed alerts, inaccurate readings, or steps that still require too much manual work. Adjust only one setting at a time and test again. Remove stale food entries, install updates through the official app, and review account permissions periodically. Add another tool or routine only after the first one works consistently and provides a clear benefit.
Frequently Asked Questions
Do I need a smart appliance to use AI in the kitchen?
No. A phone-based meal-planning or inventory app can help organize recipes and groceries without a connected appliance. A compatible sensor or appliance is needed for live device readings or controls.
Can an AI kitchen tool tell me whether food is safe to eat?
Do not rely on AI alone to judge food safety. Check storage time, package directions, signs of spoilage, and trusted food-safety guidance. Use a food thermometer when a safe internal temperature must be verified.
Why does my device require 2.4 GHz Wi-Fi?
Some connected kitchen devices support 2.4 GHz networks but not 5 GHz. Check the model manual or compatibility page, then connect your phone to the supported network during pairing if needed.
Can I let an AI assistant control my oven?
Only use controls supported by the appliance manufacturer, and follow its operating and safety instructions. Keep people and pets away from hot surfaces, and do not rely on remote or automated control as a substitute for supervision.